The Pleasure of the DIY Creation Calendar: A 2000-Phrase Exploration of Cardboard Creativity
Associated Articles: The Pleasure of the DIY Creation Calendar: A 2000-Phrase Exploration of Cardboard Creativity
Introduction
On this auspicious event, we’re delighted to delve into the intriguing matter associated to The Pleasure of the DIY Creation Calendar: A 2000-Phrase Exploration of Cardboard Creativity. Let’s weave fascinating info and provide recent views to the readers.
Desk of Content material
The Pleasure of the DIY Creation Calendar: A 2000-Phrase Exploration of Cardboard Creativity

The appearance calendar. A harbinger of the festive season, a countdown to Christmas brimming with anticipation. However the mass-produced, chocolate-filled variations usually lack a sure… je ne sais quoi. They’re gratifying, definitely, however they lack the non-public contact, the distinctive fingerprint of the creator. That is the place the DIY introduction calendar, particularly one crafted from humble cardboard, steps in. It is a challenge that gives a rewarding mix of creativity, personalization, and lasting recollections, far surpassing the fleeting pleasure of a pre-packaged deal with.
This text will delve into the world of crafting your individual cardboard introduction calendar, exploring varied design choices, materials concerns, filling concepts, and the general course of, remodeling a easy sheet of cardboard right into a cherished Christmas custom.
Half 1: Selecting Your Cardboard and Design
The inspiration of your introduction calendar is the cardboard itself. You’ve gotten a wealth of choices:
-
Recycled Cardboard: That is probably the most environmentally pleasant and infrequently probably the most available alternative. Suppose cereal packing containers, Amazon packaging, and even sturdy items out of your recycling bin. The thickness will differ, so select one thing strong sufficient to carry its form and stand up to potential put on and tear.
-
Cardboard Sheets: Artwork provide shops and craft outlets promote sheets of cardboard in varied thicknesses and sizes. This affords a cleaner, extra uniform base on your design, significantly useful for intricate initiatives.
-
Corrugated Cardboard: This kind of cardboard, with its distinctive ridges, supplies additional power and a novel texture. It is splendid for bigger, extra complicated calendars.
As soon as you have chosen your cardboard, the design potentialities are just about limitless. Listed here are just a few concepts to encourage you:
-
Conventional Home Form: A traditional alternative, this design permits for an enthralling, village-like aesthetic. You may create particular person numbered home windows or doorways, every revealing a shock. Contemplate including small particulars like chimneys, home windows, and a roofline utilizing further cardboard or craft supplies.
-
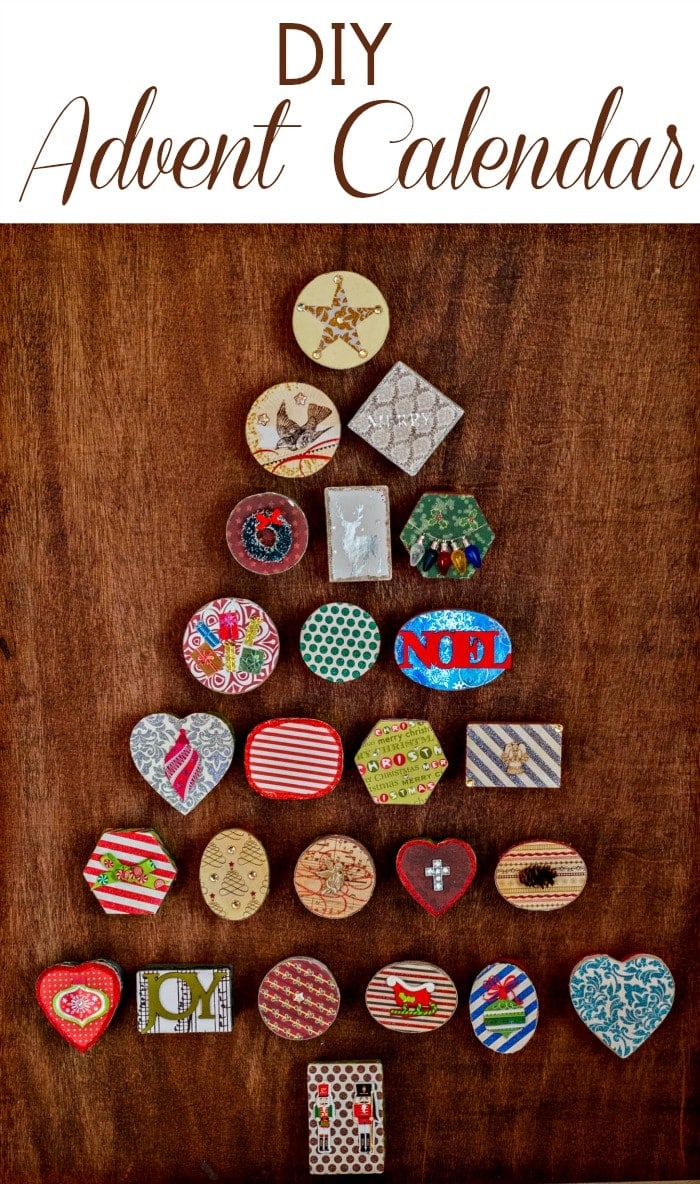
Christmas Tree Design: A festive and space-saving choice, particularly for smaller areas. Quantity the ornaments hanging from the tree, or create numbered pockets alongside the branches.
-
Creation Village: Create a miniature village scene with particular person homes or buildings, every representing a day of Creation. It is a extra bold challenge, however the result’s extremely rewarding.
-
Reindeer or Snowman: Form your cardboard right into a festive character and create numbered pockets inside the design. This provides a playful and distinctive contact.
-
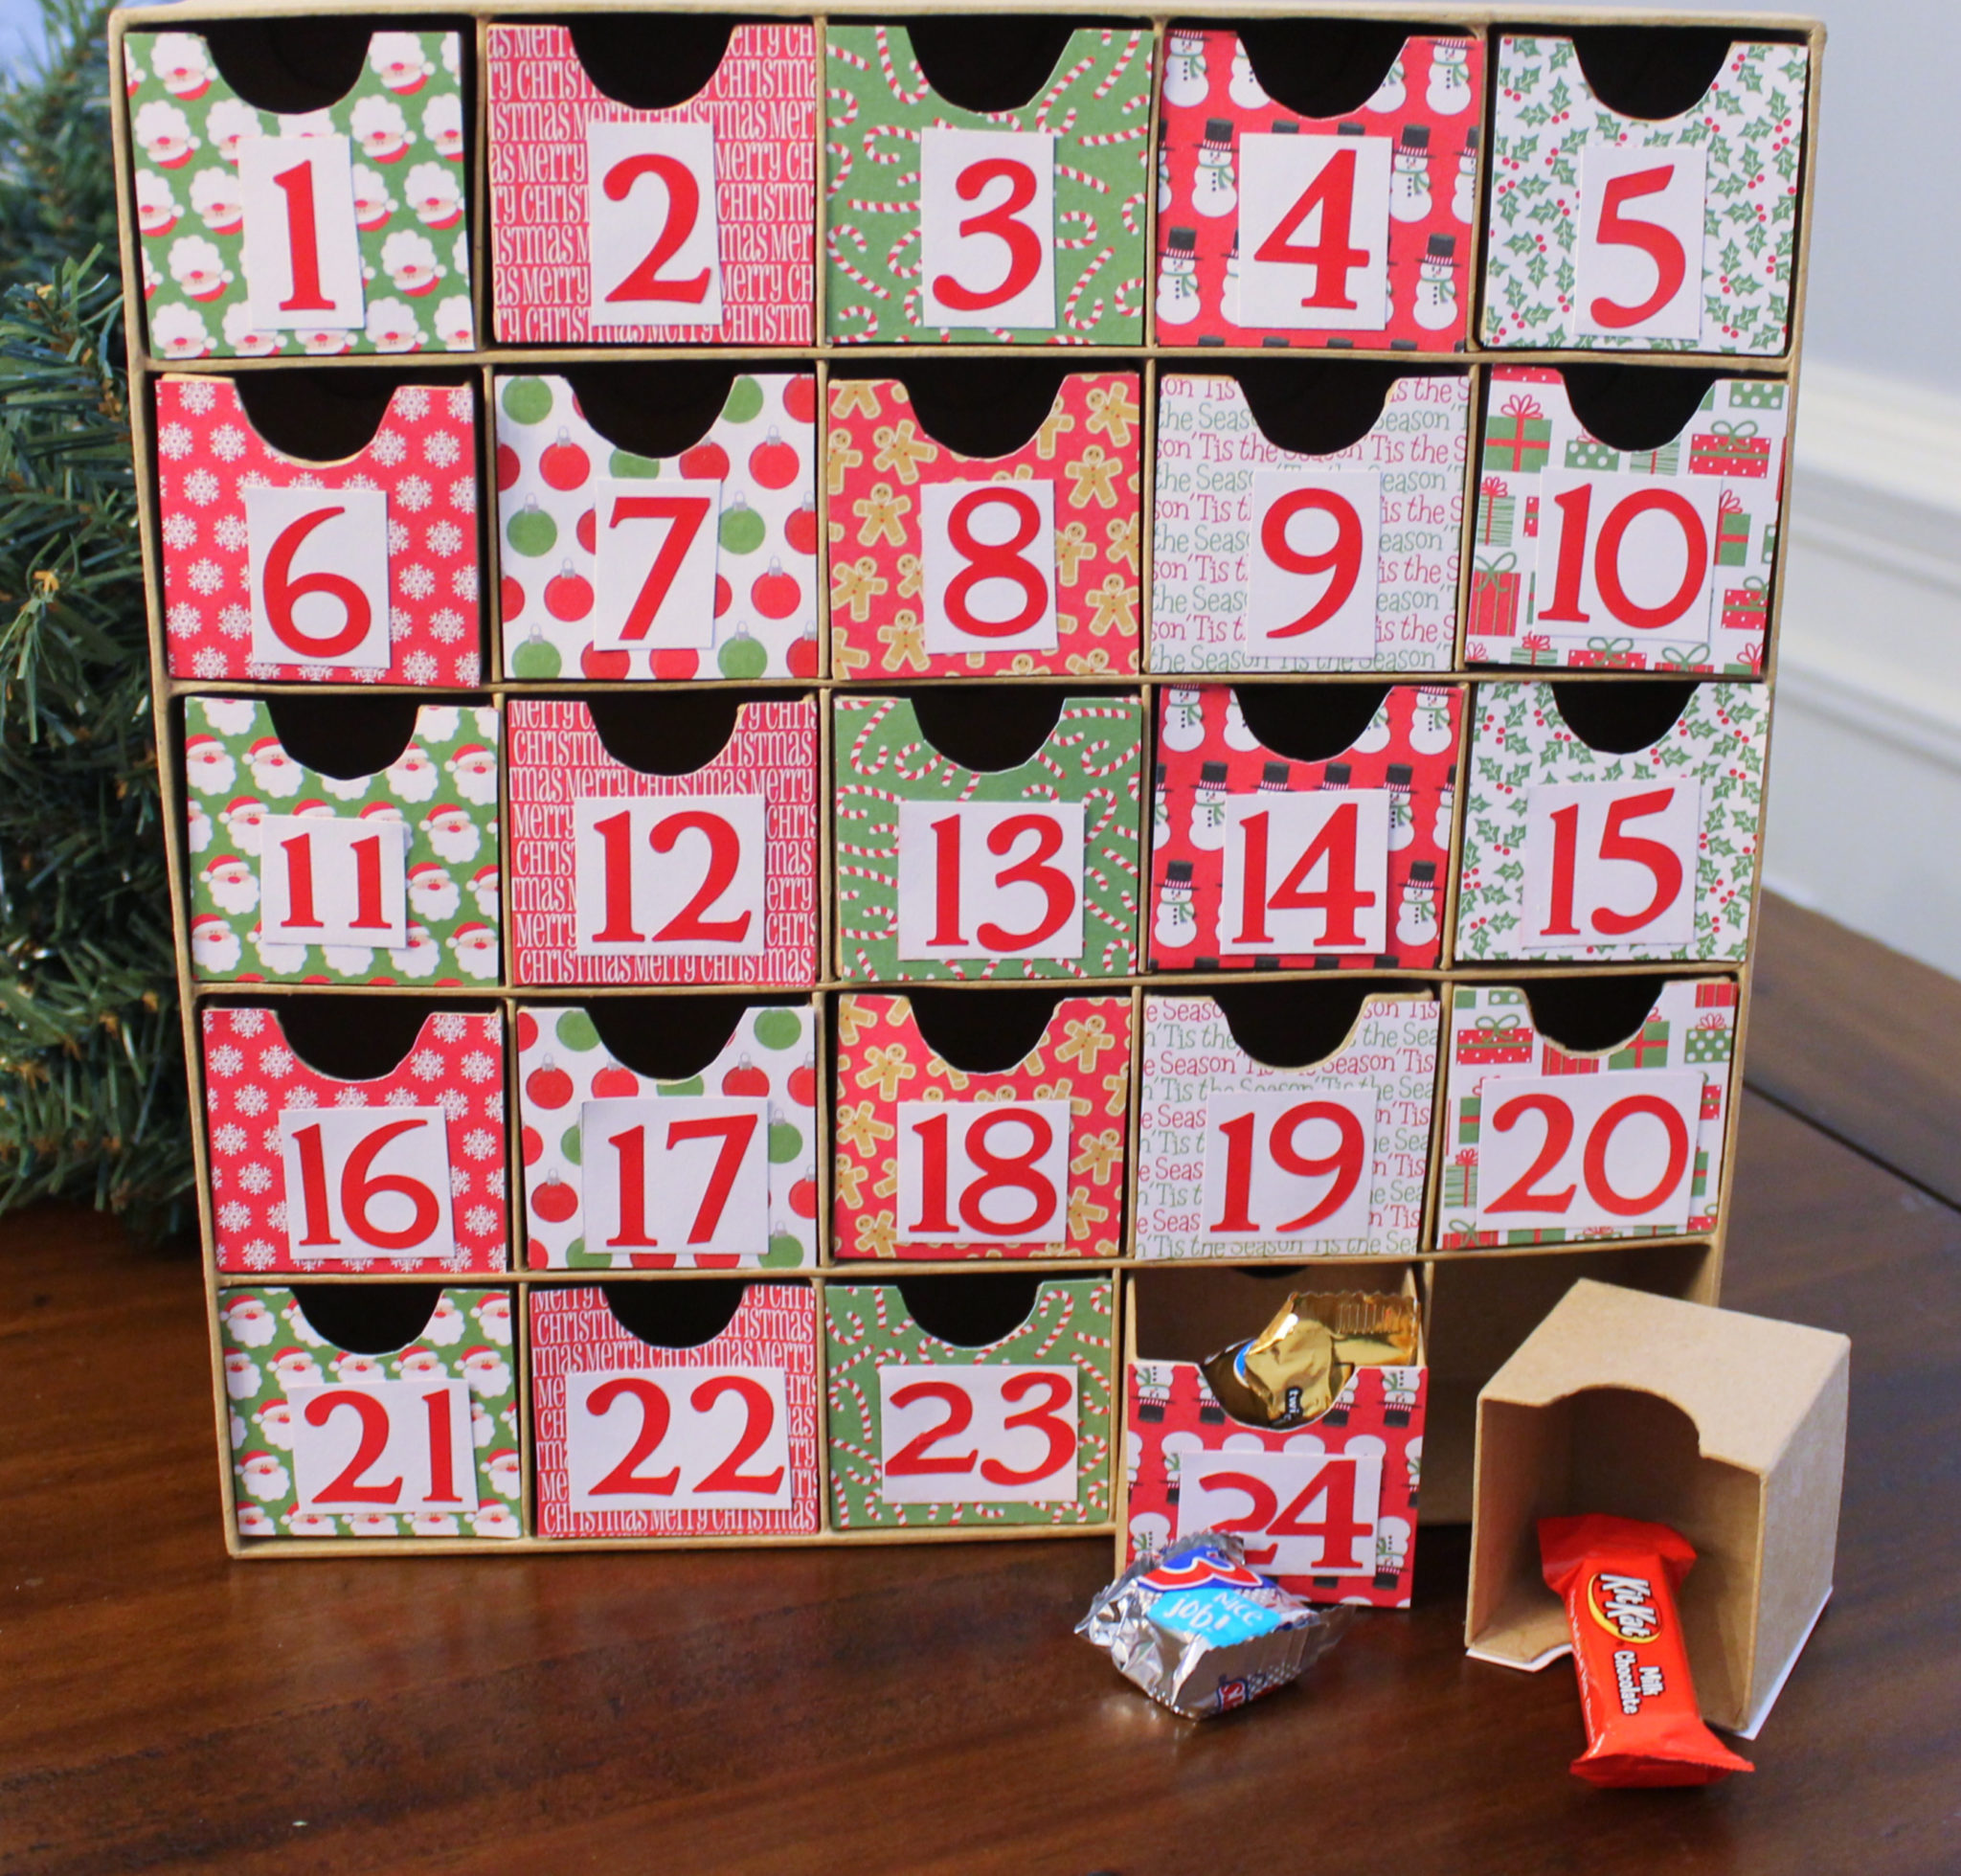
Easy Numbered Pockets: For a minimalist strategy, create a grid of numbered pockets straight onto a sheet of cardboard. It is a nice choice for novices and permits for max flexibility by way of measurement and ornament.
-
Interactive Calendar: Incorporate shifting components, comparable to small doorways that open or flaps that raise, so as to add a component of shock and enjoyable.
Half 2: Instruments and Supplies
Past the cardboard itself, you may want a number of instruments and supplies to deliver your imaginative and prescient to life:
-
Slicing Instruments: A craft knife, scissors, or perhaps a rotary cutter are important for exact reducing. At all times use a reducing mat to guard your work floor.
-
Ruler and Pencil: Accuracy is essential, particularly when creating intricate designs. A ruler and pencil will assist you to measure and mark out your design earlier than reducing.
-
Glue: A powerful adhesive is essential for securing completely different components of your calendar collectively. Sizzling glue is fast and efficient, however craft glue is an efficient different for extra delicate work.
-
Ornamental Supplies: That is the place your creativity actually shines! Think about using:
- Wrapping Paper: Cowl your cardboard with festive wrapping paper so as to add a pop of shade and sample.
- Paint: Acrylic paints are versatile and straightforward to make use of, permitting you to customise the colour scheme of your calendar.
- Markers and Crayons: Excellent for including particulars, numbers, and private touches.
- Glitter: Add some sparkle to your design with glitter glue or sprinkled glitter.
- Ribbons and Twine: Use ribbons or twine to tie up pockets or add ornamental accents.
- Buttons, Stickers, and Different Elaborations: Add additional character with small ornamental parts.
-
Small Luggage or Envelopes: To carry your treats or small items. You can also make these from material scraps, small paper luggage, and even repurpose small containers.
Half 3: Building and Meeting
The meeting course of will differ relying in your chosen design. Nevertheless, listed here are some basic steps to information you:
-
Design and Planning: Sketch your design on paper first. This lets you refine your concepts and guarantee every little thing is proportionate earlier than reducing into your cardboard.
-
Slicing the Cardboard: Rigorously minimize out the items in line with your design. Take your time and use a pointy blade to make sure clear cuts.
-
Assembling the Construction: In case your design includes a number of items, fastidiously glue them collectively. Use clamps or weights to carry the items in place whereas the glue dries.
-
Creating Pockets or Compartments: Relying in your design, you may have to create pockets or compartments to carry your treats. You should use small luggage, envelopes, and even minimize and fold sections of cardboard to create them. Safe them firmly with glue.
-
Adorning: As soon as the construction is full, it is time to unleash your creativity! Beautify your calendar with paint, paper, glitter, ribbons, and different elaborations.
-
Numbering: Clearly quantity every pocket or compartment from 1 to 24 (or nevertheless many days you select). Use a marker, sticker, and even small numbered tags.
Half 4: Filling Your Creation Calendar: Past Chocolate
The actual magic of a DIY introduction calendar lies in its capability to be personalised. Whereas chocolate is a traditional alternative, contemplate these alternate options:
-
Small Toys or Collectible figurines: Excellent for youngsters, these will be themed round Christmas or different pursuits.
-
Miniature Books or Puzzles: Partaking and academic choices for all ages.
-
Experiences: As a substitute of bodily objects, embody small slips of paper with actions or experiences, comparable to "household film night time" or "bake cookies collectively."
-
Acts of Kindness: Encourage generosity by together with prompts for acts of kindness, comparable to "assist with chores" or "write a thank-you notice."
-
Handmade Treats: Bake cookies, candies, or different festive treats and bundle them individually.
-
Coupons or Present Certificates: Provide small reductions or present certificates to favourite shops or eating places.
-
Images: Embody cherished household photographs from earlier Christmases.
-
Inspirational Quotes or Messages: Unfold cheer and positivity with uplifting messages.
-
Jokes or Riddles: Add a contact of humor and lightheartedness to the countdown.
Bear in mind to tailor the contents to the recipient’s age and pursuits. A personalised calendar stuffed with considerate items and experiences will create lasting recollections far exceeding the fleeting sweetness of mass-produced goodies.
Half 5: Past the Calendar: A Household Custom
Making a DIY cardboard introduction calendar is greater than only a craft challenge; it is a chance to create a cherished household custom. Contain the entire household within the course of – from brainstorming designs to adorning and filling the calendar. The shared expertise of making one thing collectively will strengthen bonds and create lasting recollections.
Moreover, contemplate making this an annual custom. Annually, you may create a brand new calendar with a unique design and theme, documenting the household’s progress and evolution by the years. These calendars will turn into treasured keepsakes, reminding you of the enjoyment and anticipation of Christmases previous.
In conclusion, crafting your individual cardboard introduction calendar is a rewarding and deeply private challenge. It permits you to unleash your creativity, personalize the expertise, and create lasting recollections for years to return. So, collect your supplies, let your creativeness run wild, and embark on this festive journey! The enjoyment of the DIY introduction calendar awaits.


Closure
Thus, we hope this text has offered helpful insights into The Pleasure of the DIY Creation Calendar: A 2000-Phrase Exploration of Cardboard Creativity. We thanks for taking the time to learn this text. See you in our subsequent article!